
In this document we will how you two ways that a custom workflow can be executed from the Savant App.
Method 1 - Using the Lighting data table:
WARNING: If you are forced to regenerate the data table information, the following customizations will be lost.
1> Create your custom workflow, under the lighting service in each zone. In this example I have called my custom workflow "Relay"
NOTE: You MUST create the same custom workflow in each zone or the action will not be listed as a selection in the lighting data table later.

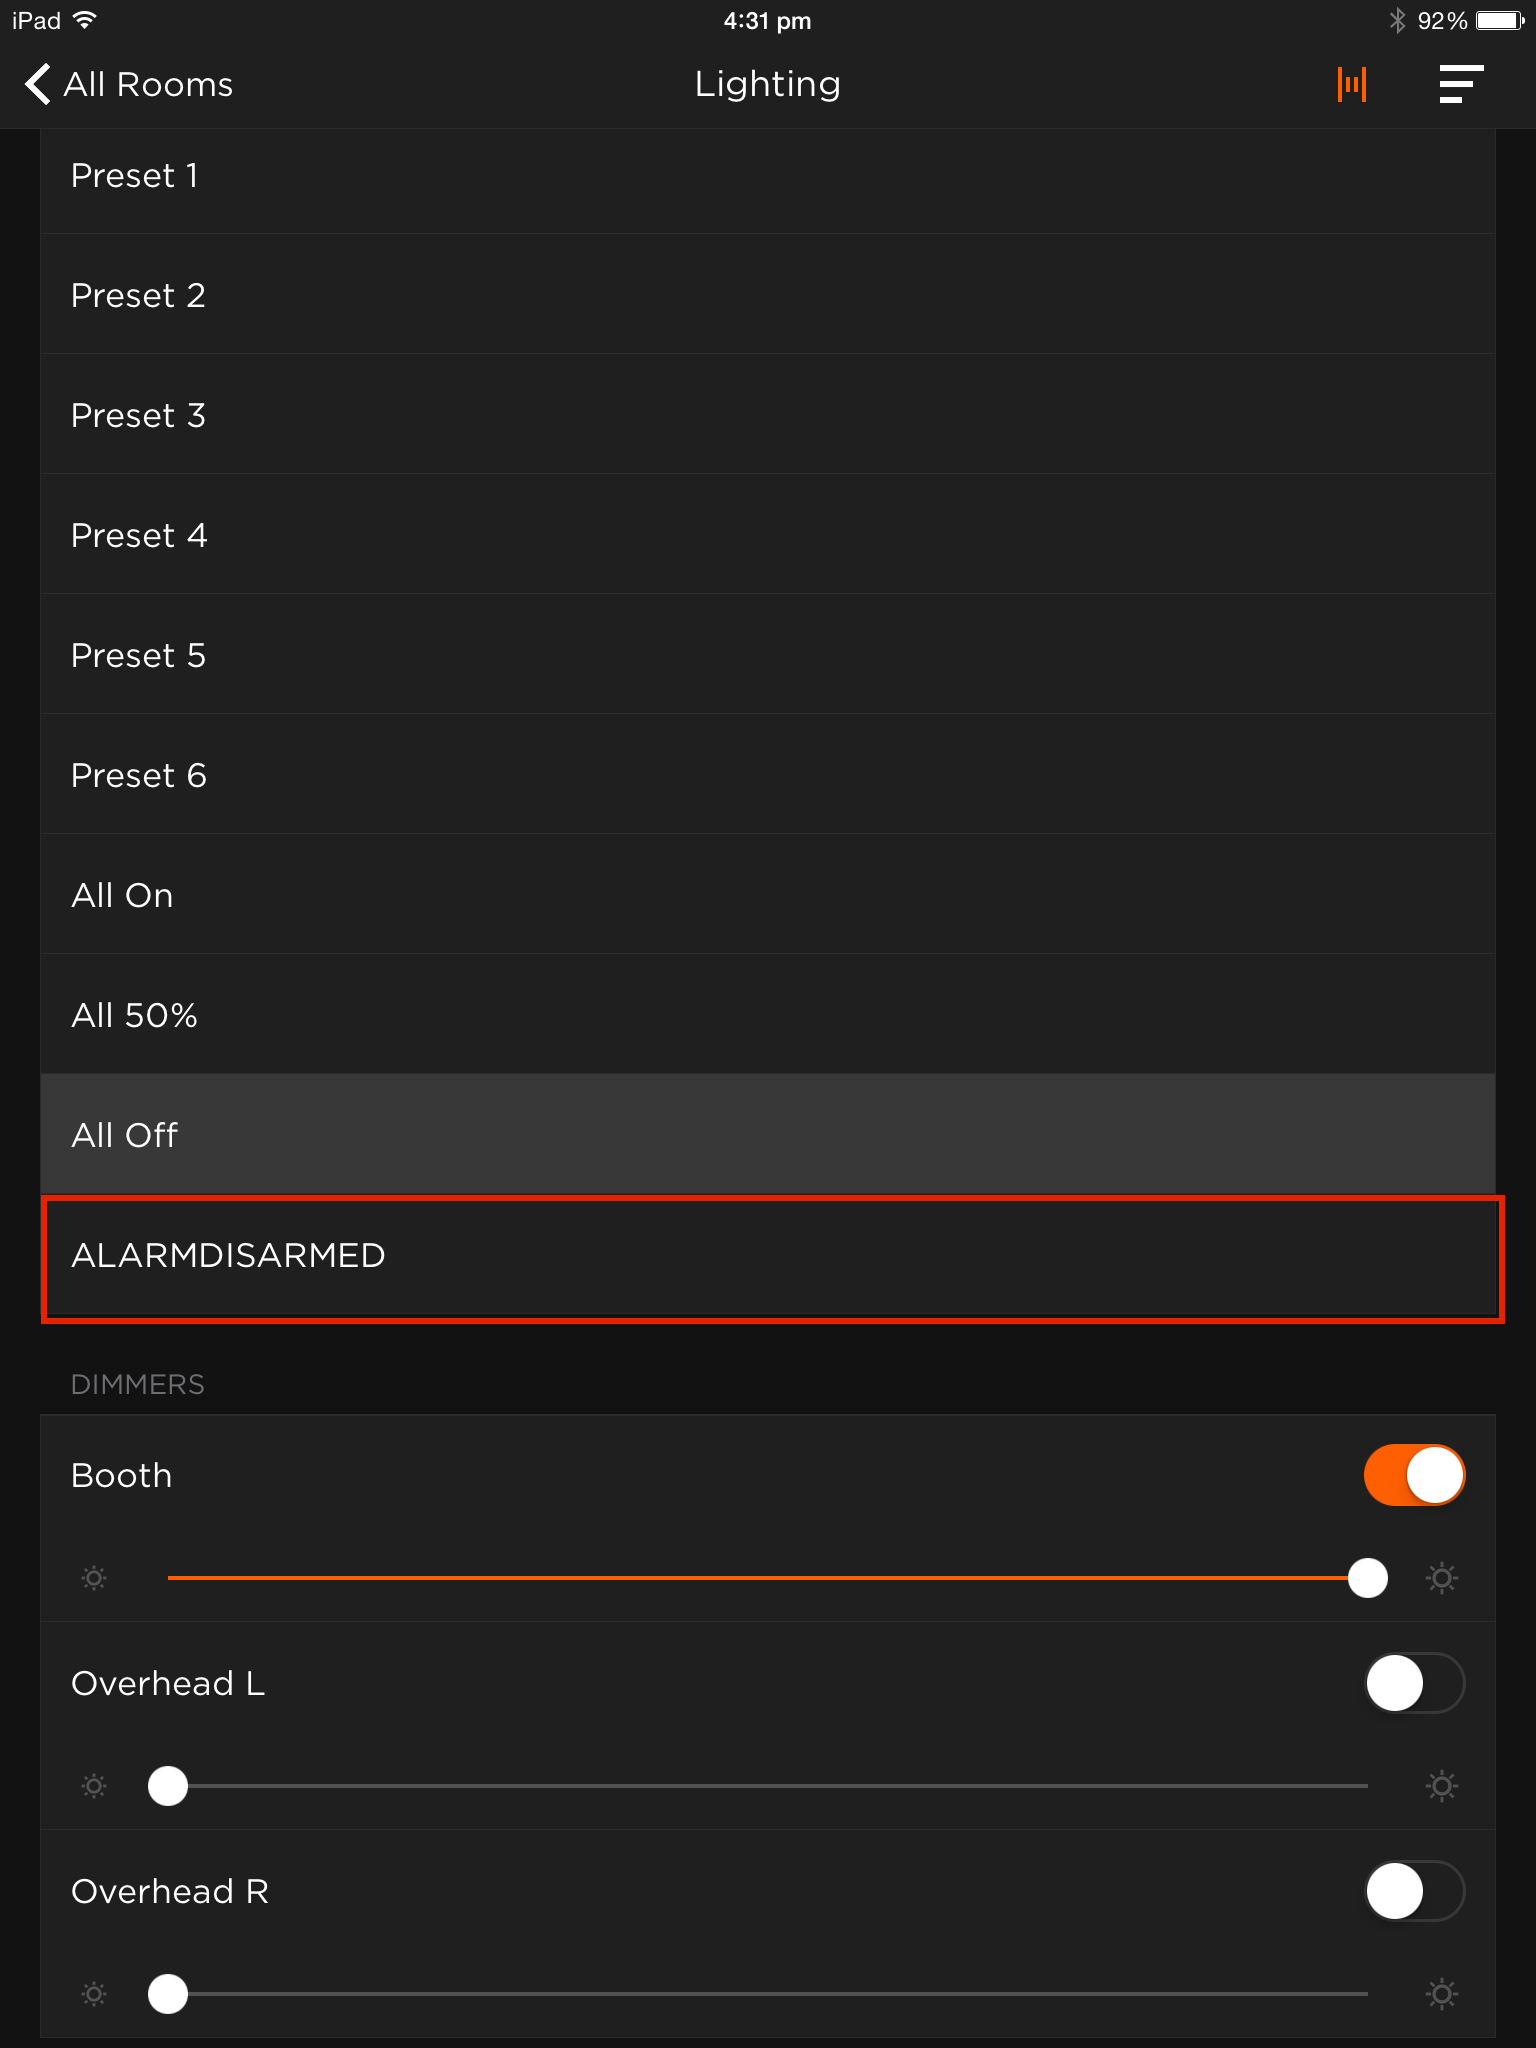
2> Add a new entry to your lighting data table.
NOTE: The "Entity" you choose is largely irrelevant for this purpose. Use the "UI Type" drop down to select the type UI element you want.
3> User the "Command" selector drop down to assign your custom workflow to the press, release or toggle actions of the new element as appropriate.
NOTE: You don't need to add the same workflow to all actions. You can, for example, execute one workflow on the "push" action and another on "release".

Method 2 - Enabling Custom Workflows
NOTES:
There is no way to get feedback on this method. Nor is there any way to 'categorize' the way the workflow appears in the UI.
This is the same method used to enable custom workflows on the SUR-0500 as described in the deployment guide here:
http://dealers.savantav.com/portal/SavantSandbox/Released%20Deployment%20Guides/009-1071-07%20Savant%20Universal%20Remote%20(SUR-0500)%20Deployment%20Guide%201.pdf
1> Create a custom workflow for the configuration under General Programmable Service Requests for a zone.
2> Repeat step 1 for all zones where the workflow will be available.
3> Generate services for the configuration.
4> Open the Custom Workflow Usage window: Tools > Review > Custom Workflow Usage
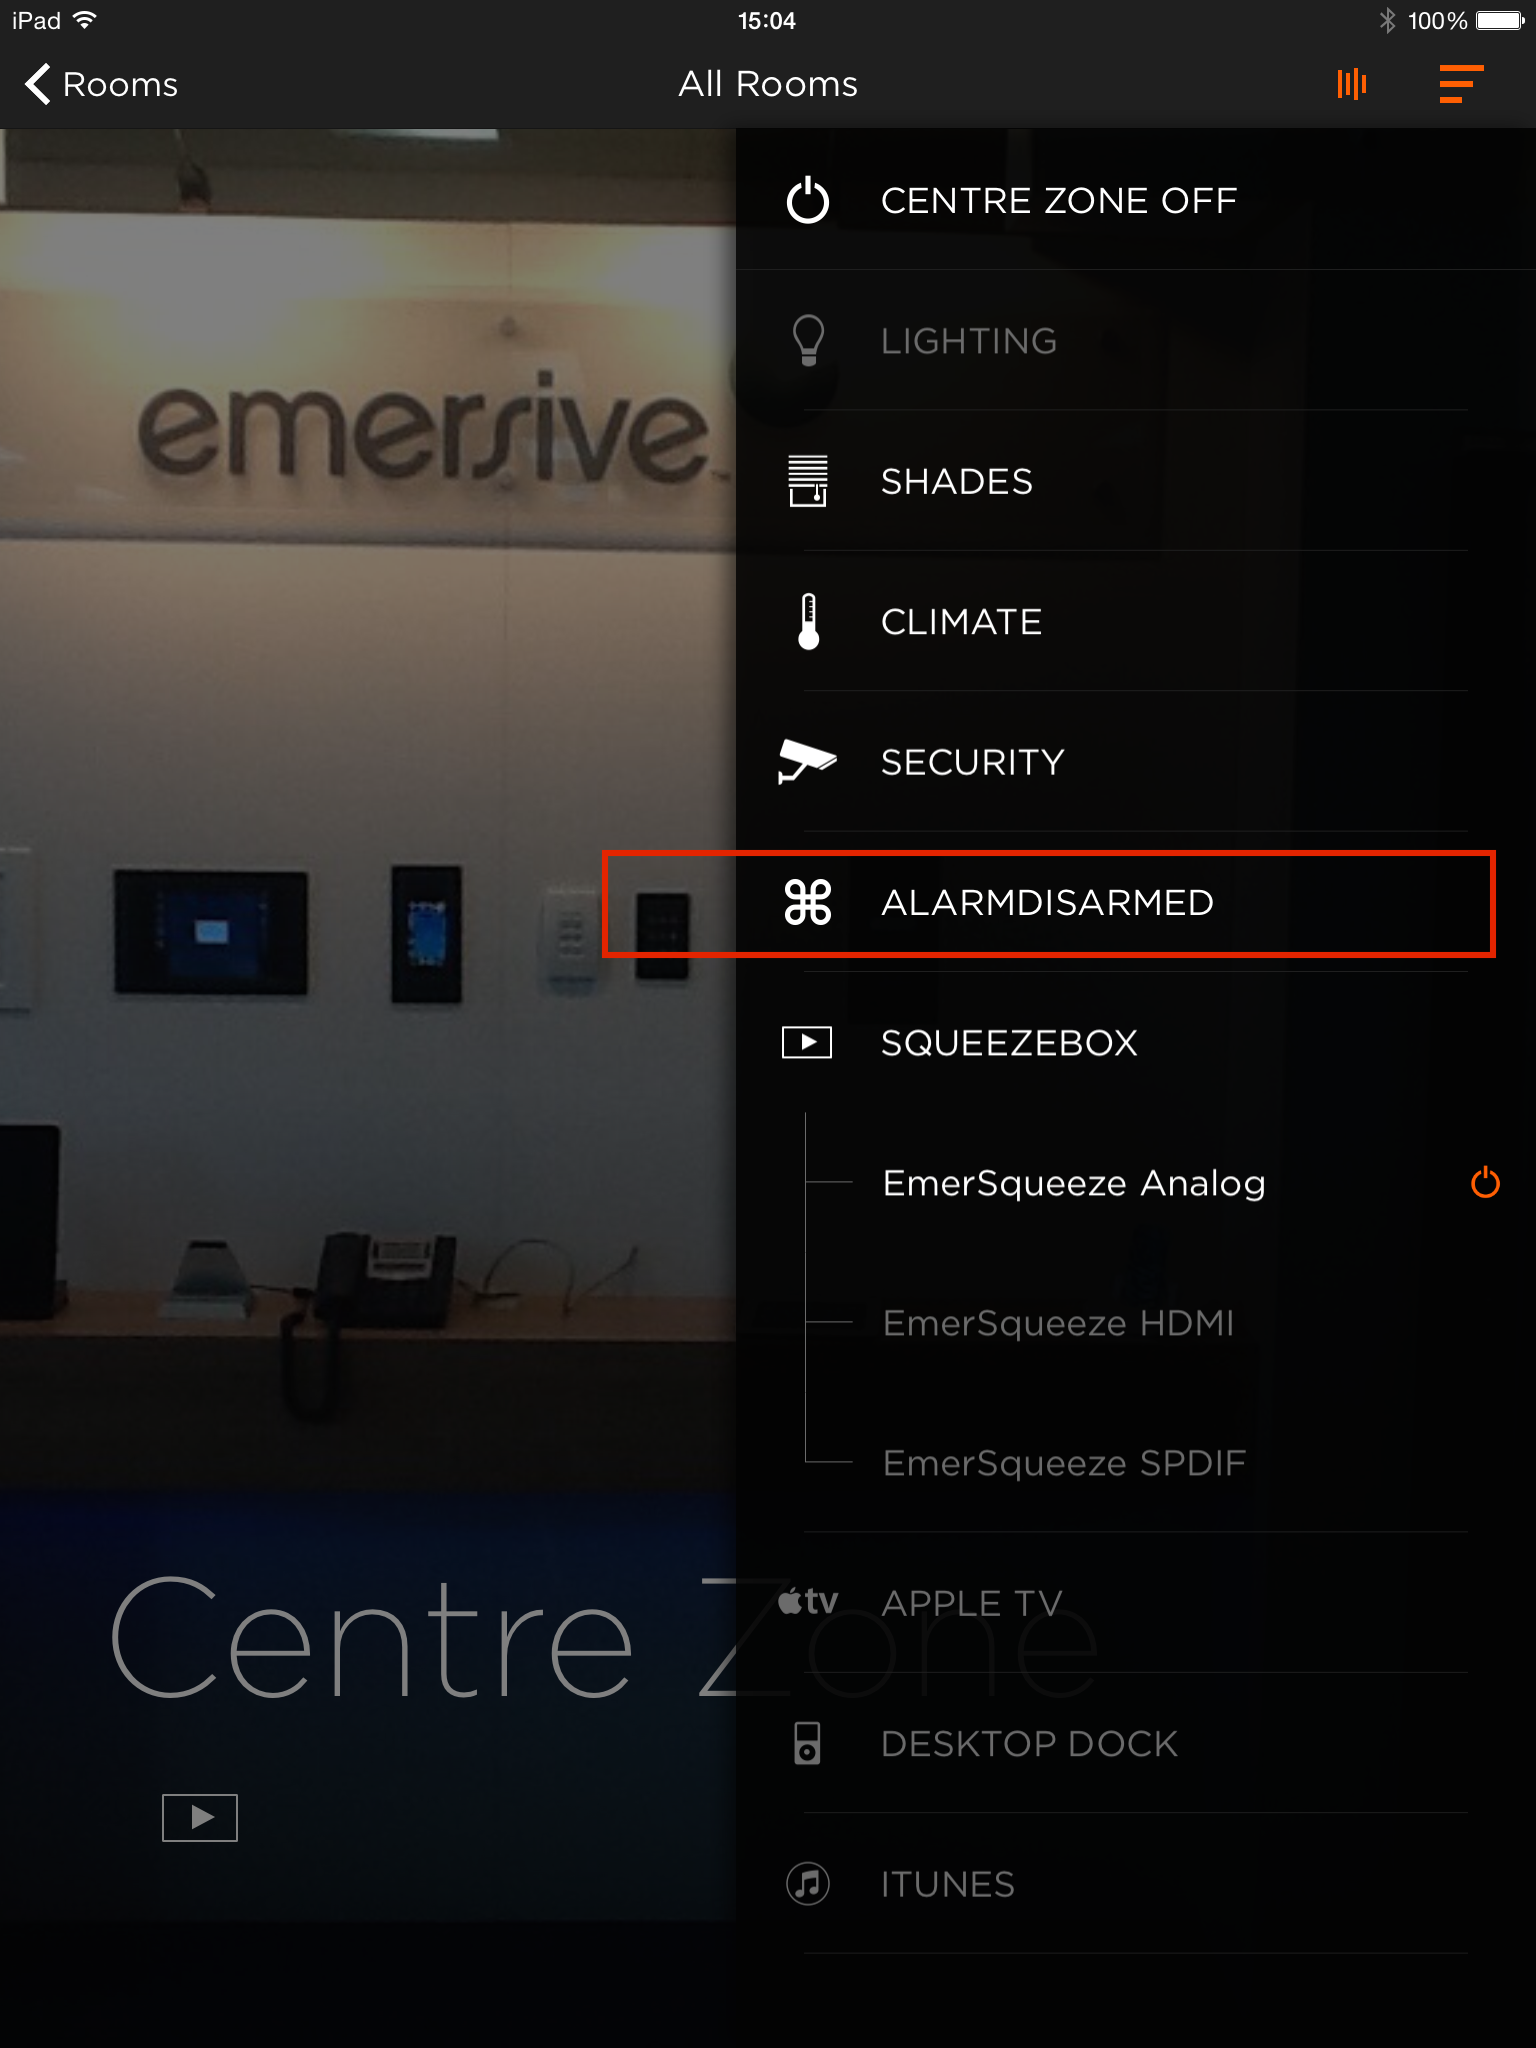
5> Check the box in the UI column to use the workflow on the Savant app.
Note: This workflow is also used in a State trigger. That's why it appears blue.
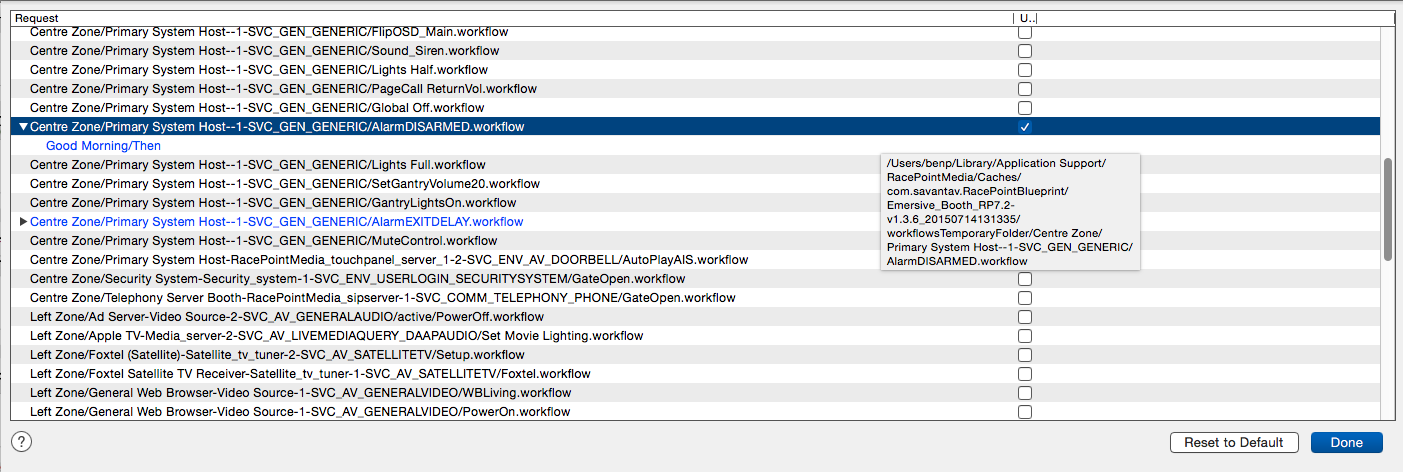
6> Repeat step 5 for the remaining workflows and click "Done" to save the changes.
0 Comments